The month of September is almost gone and the holiday season is starting. I have to admit that this is my absolute favorite time of the year. I am not sure how the weather looks your part of the world, but here, in Northern California is absolutely beautiful and I am always looking forward to this time of the year.
Today, I have something so special for you. A little inspiration that you can create for yourself or to give as a Xmas gift.
This design was inspired by Cardstock Warehouse (click HERE), a phenomenal cardstock company. I have been a HUGE fan of CW for a long time and I’ve used it in numerous projects and whenever I am in need of colored cardstock, I always go back to them.
One thing that I simply have to mention is that their paper is made in the US. This is a true American company and I love to support our brands.
Today’s project is inspired by a beautiful piece made by Erica Walsh with Cardstock Warehouse. I highly encourage you to take a look at her tutorial HERE. It is available on YouTube and you will have a blast watching it. I know I have!
This is how beautiful Erica’s design is! I was so blown away by how colorful and cheery her design and I got inspired to create something of such sort.
Unfortunately, I was limited on cardstock, and I wanted to use what I already have in my stash.
And this is my creation…
I hope you like it
The main “ingredient” for this project is, of course paper. What I used is cardstock from Cardstock Warehouse and all of my paper is much heavier than the cardstock that Erica used in her project. What Erica used is 65 lbs and my cardstock is 100 lbs. That is absolutely fine, the only difference is in how you’re going to handle that cardstock.
I also used my Cricut Maker machine, and if you do not have anything of such sort, you can use flower dies that you might have in your stash. Options are truly endless.
First, I found and modified images using Cricut Design Space. This is a wonderful platform for all Cricut users and it is absolutely free. There are a lot of images and finished projects that you can download and modify to your liking.
Since I only had 8.5 x 11 size paper, I had to get creative with my envelope; and even if I had 12×12 paper, I am not entirely certain that my envelope would fit on it.
I knew I wanted to frame my work, and the inside of my shadow box was 9×9, so I made my envelope 1/2″ smaller, 8 1/2 x 8 1/2. I then sliced the flaps so they could be glued to the base later. I would not recommend you do this if you were making mailing envelopes, but for an art projects, a technique like this is absolutely acceptable.
I cut a full basket of flowers. I might have gone a little bit overboard, but I would rather have more and not use it, than having to go through the process again.
And, then, it was time to assemble all those cuts into fabulous flowers. If you decide to use 100 lbs cardstock, like I have, I advise you to gently mist your cardstock with water. I used Tim Holtz spray bottle for this, and there is really nothing in it but water. For more interest, you can add a little bit of shimmer pigment in your water. This is particularly fun if you are working with dark color cardstock.
After I gently mist my cuts with water, I used stylus tools to shape them. Now, I do not have a big collection of these tools, so I used my fingers and a tip of a wax seal handle. If you are like me, anything really that is round and smooth would do the trick.
For a little more jazz, I decorated the flowers with silver pearls. You can absolutely skip this step, but I believe it gives this project so much more personality and style, especially because I decided to go with the monochromatic look.
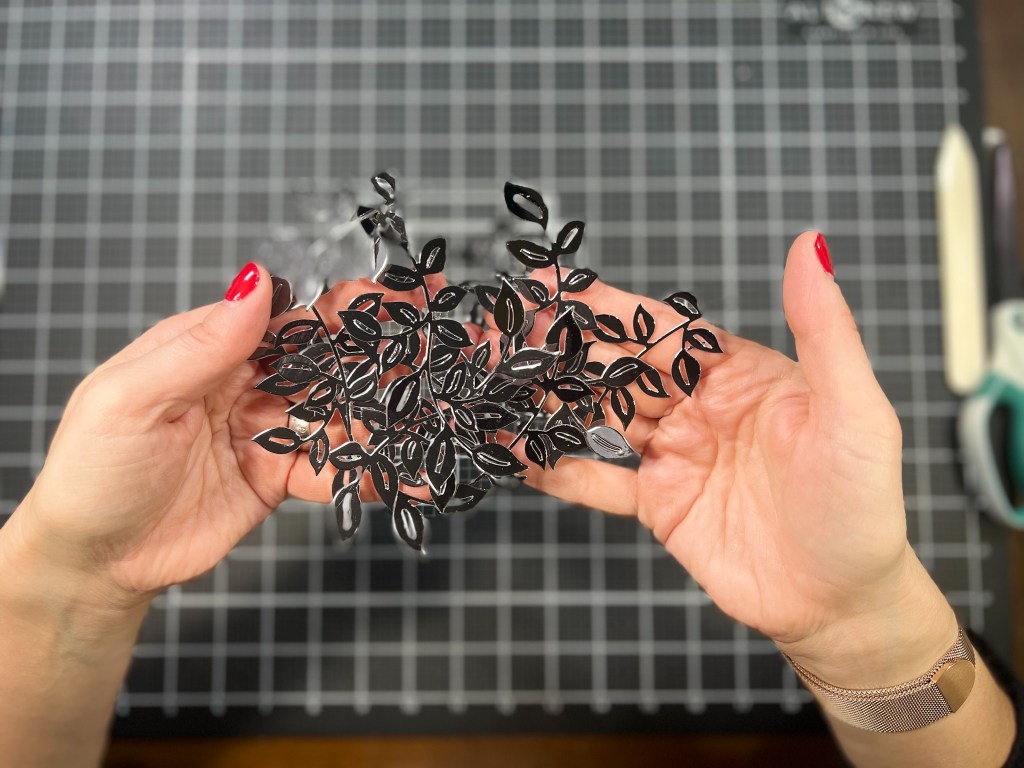
I then used dies from Pinkfresh Studio and cut bunch of leaves using mirror cardstock. I used an entire full size page to create the leaves and I got a perfect amount of leaves.
I next moved to assembling the envelope. I used a scoring board to reinforce the score lines and simply glued the flaps to the base.
Next, I pinned the envelope to the base of the frame and just like in Erica’s video, I arranged the leaves and glued them on the envelope.
I just keep adding the flowers until I was happy with my arrangement.
I did not get to use all my flowers, and now I will have some beautiful embellishments for future projects.
And, when I was done, I simply put my design inside the frame, and the project was done!
I am absolutely in love with this design.
I love the monochromatic look and will try to implement this color combination in my cards.
Thank you all for visiting me today and I will see you next week with a new post.